Flight planning : An Overview of the Process Before We Fly!
Here at LI&D we don’t just provide our clients with “insight from altitude” – we also consider our mission to educate our clients and potential clients as to the fast evolving world of drone technology, digital insight and GPS based mapping opporutnities.
With that in mind, one client asked us – “aren’t you worried you are going to crash your drone?” We have found that most people really dont’ have any idea of the sophistication that goes into planning a data-collection flight, and the safeguards that are in place.
So let’s tell you what’s involved!
In our case, we use an iPad based software program, Maps Made Easy. There are many alternatives such as Drone Deploy, Pix4D, Sentera Field Agent, DJI GS Pro … each of which has pros and cons.
This software lets us plan a flight, does an automatic calculation of the flight route, and manages the actual flight process while collecting the data. We aren’t doing all the flying – much of it is automated! And with that automation comes a number of highly intelligent capabilities to safeguard our drone, people and property.
The cool thing is that this flight planning software intelligently provides a number of key capabilities during the flight plan that it provides. :
- Battery monitoring – if the battery runs below a certain percentage, it will ‘return to home’, i.e. where our Chief Pilot is stationed in the field. We can swap in a fresh one, and it will then automatically go back, resuming the flight from where it left off!
- Speed control, adjusting for factors such as wind or available light.
- Adjusting for terrain awareness based on optical or infrared avoidance, i.e. trees, hills, and buildings. Smart drones don’t often crash!
In addition, consultation in advance with our client to create a pre-flight plan will allow us to determine:
- The altitude for the flight (the resolution of images will change based upon the height flown at, which we determine dependant on our plans for further analysis of the images collected). For example, a flight at 100 metres would get us photos with a resolution of 2.4 cm/pixel. You don’t worry about that – we know what we are looking for!
- The overlap percentage of each image, i.e, how the pictures collected with adjoin other images – this too is based upon our data processing objectives.
Last but not least, keep in mind that the drone operator i.e. our Chief Pilot – is ultimately responsible for not flying within controlled areas unless authorization has been received from the airspace governing body, where in Canada the authorization comes from NavCanada and from the FAA in the United States.
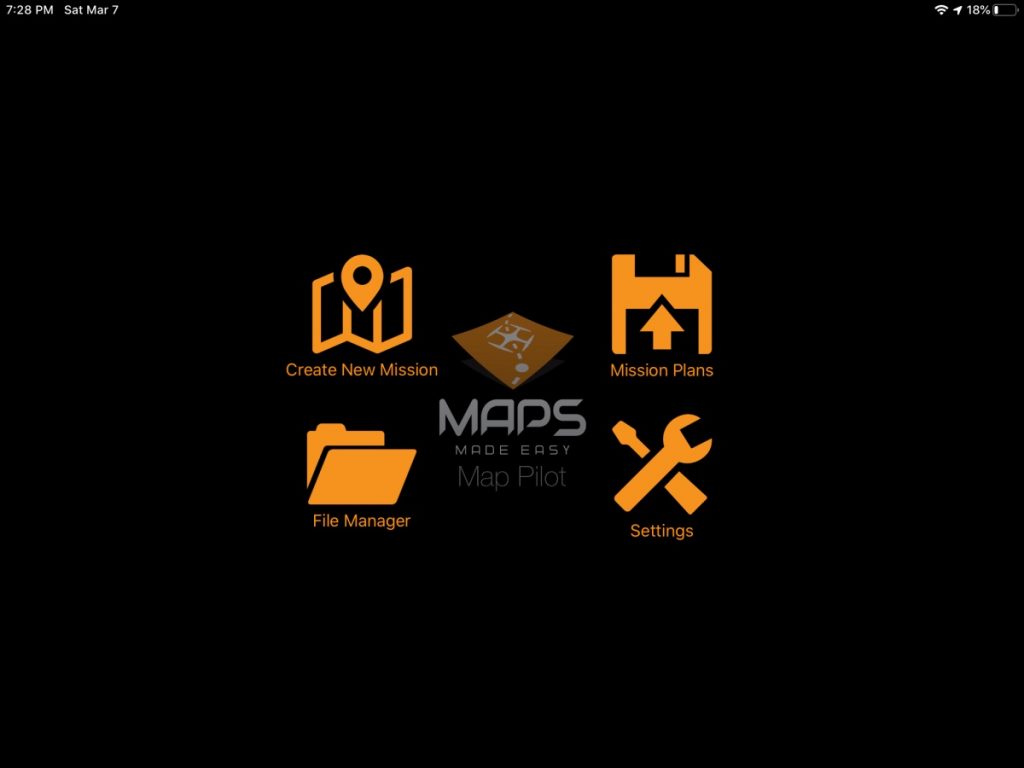
Got it? Let’s take a look! Here’s what we get in our opening screen of our flight software. We can create a new mission, review past missions (and reuse them for recurring analysis), and review other information.
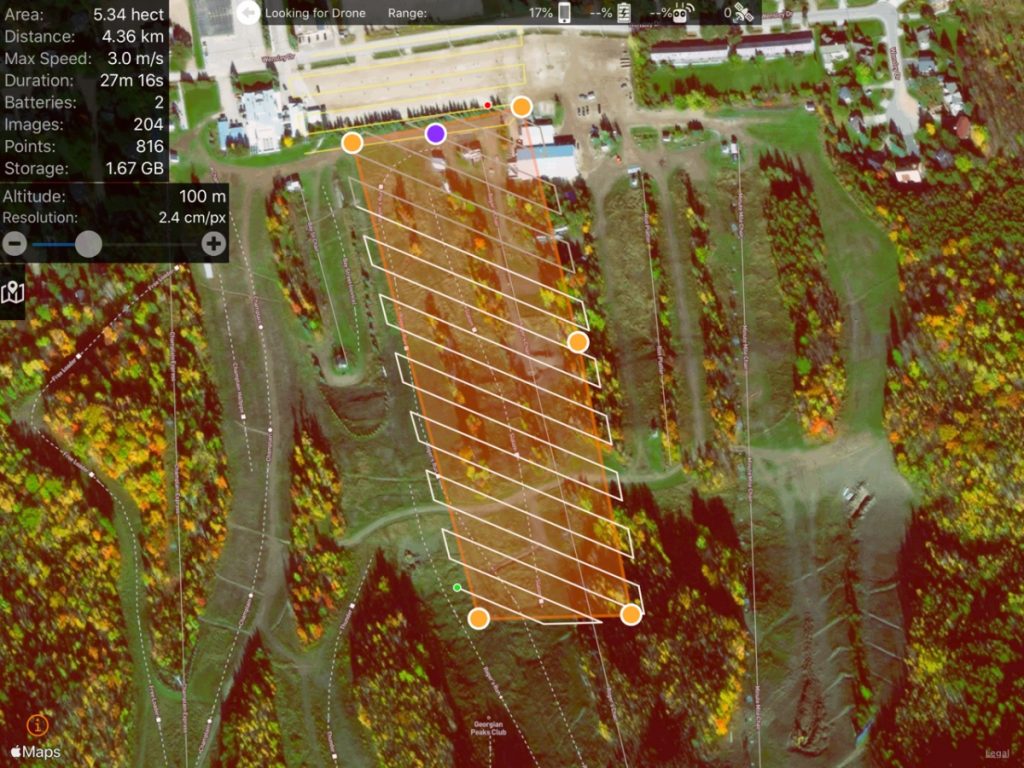
For example, here are the details of a previous flight that we flew for 27 minutes and 16s for a ski hill operator where we collected 1.67GB of data, and used 2 batteries!
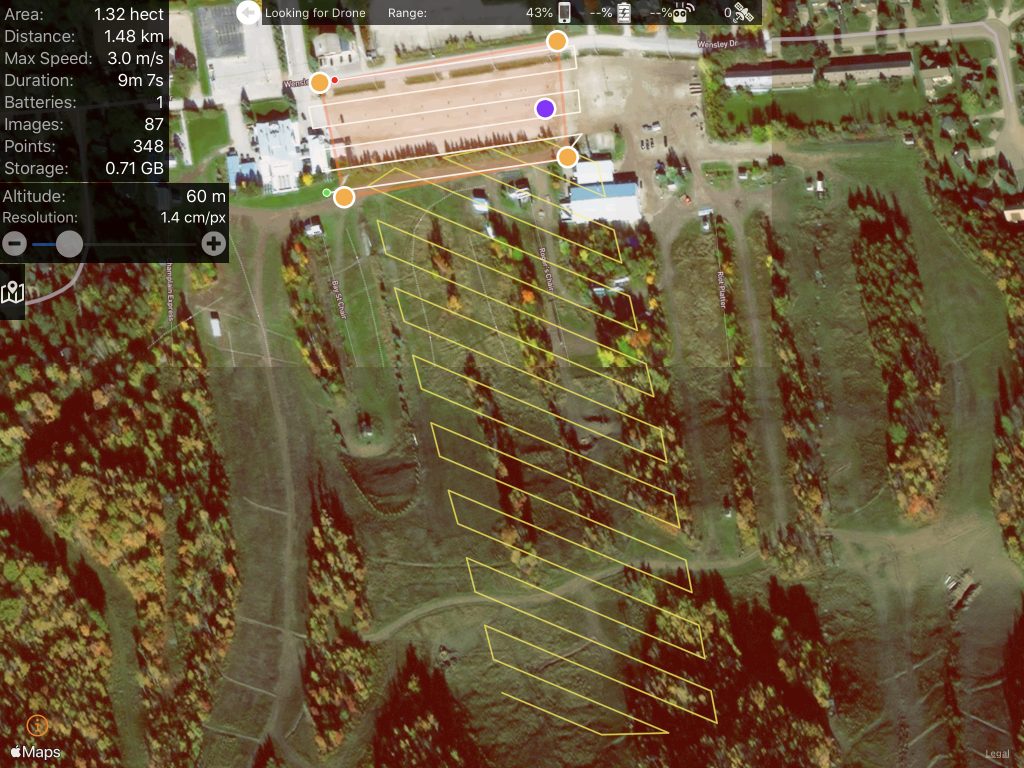
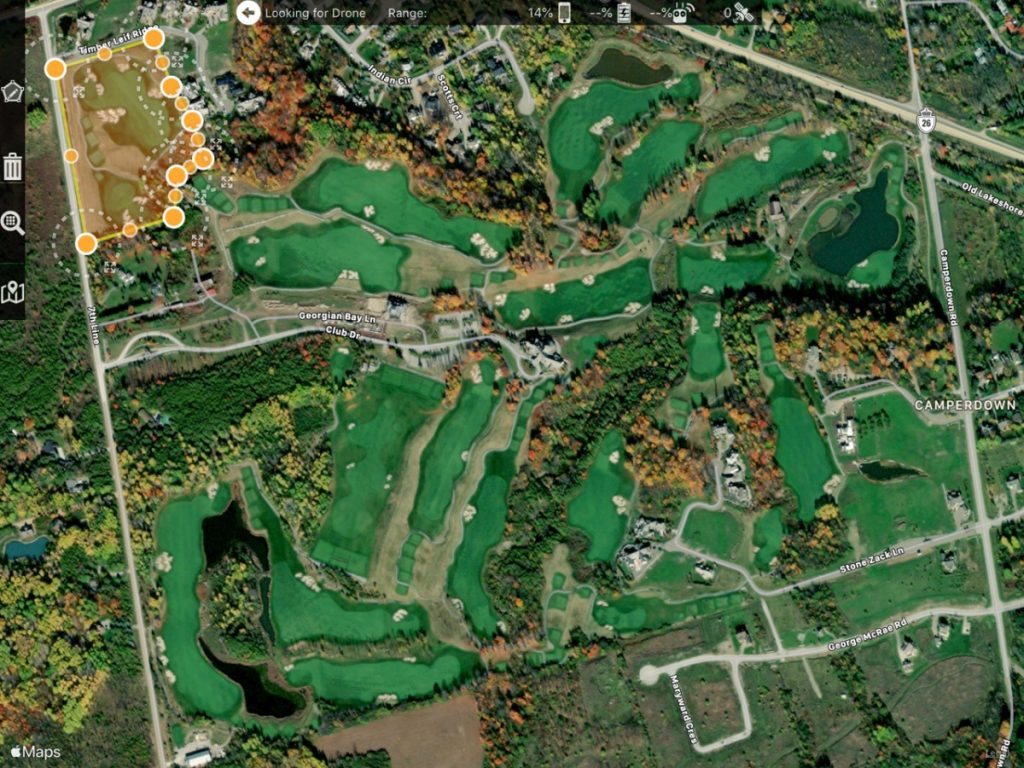
Onwards! Before we arrive at a new golf course for a turf health survey we conduct out pre-flight planning at the office. Eyeballing the base maps in the app, we come up with a basic flight plan based on what we see in the map with key features and the terrain. For this project we suspect we would break it into 6 or 7 different flights due to the size of land to cover.
We start out by highlighting the first flight – we’ll undertake it at the area at the top left. We simply draw the area with our finger or stylus to highlight the area we want to cover.
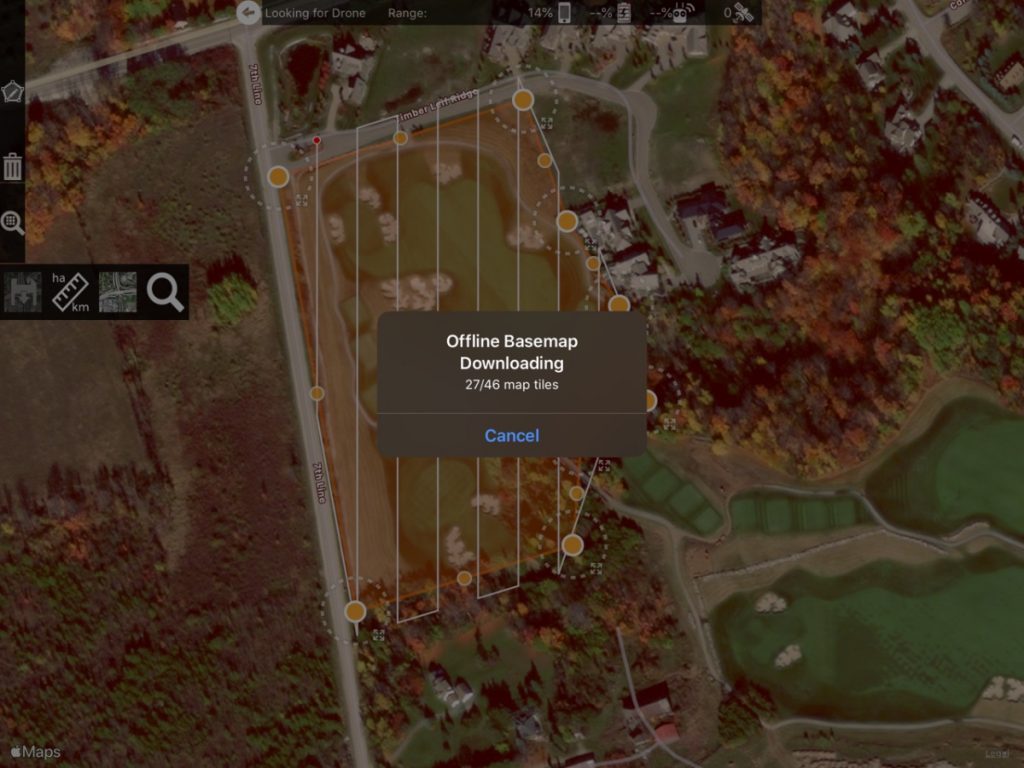
Here’s where it gets interesting – at that moment, the software builds the flight plan in under a second. When the drone is ready to fly it will fly in a grid pattern – north/south – with 8 flight paths back and forth. Note that we can adjust the overall direction based on factors such as wind direction!

Since we might not be connected to the Internet the whole time, we do need to make sure we’ve got an offline map, which is useful for protection of the drone during flight! It is helpful when flying to have a basemap to help identify any hazards that we continuously watch out for when we fly.
We then define the second area in the same way:
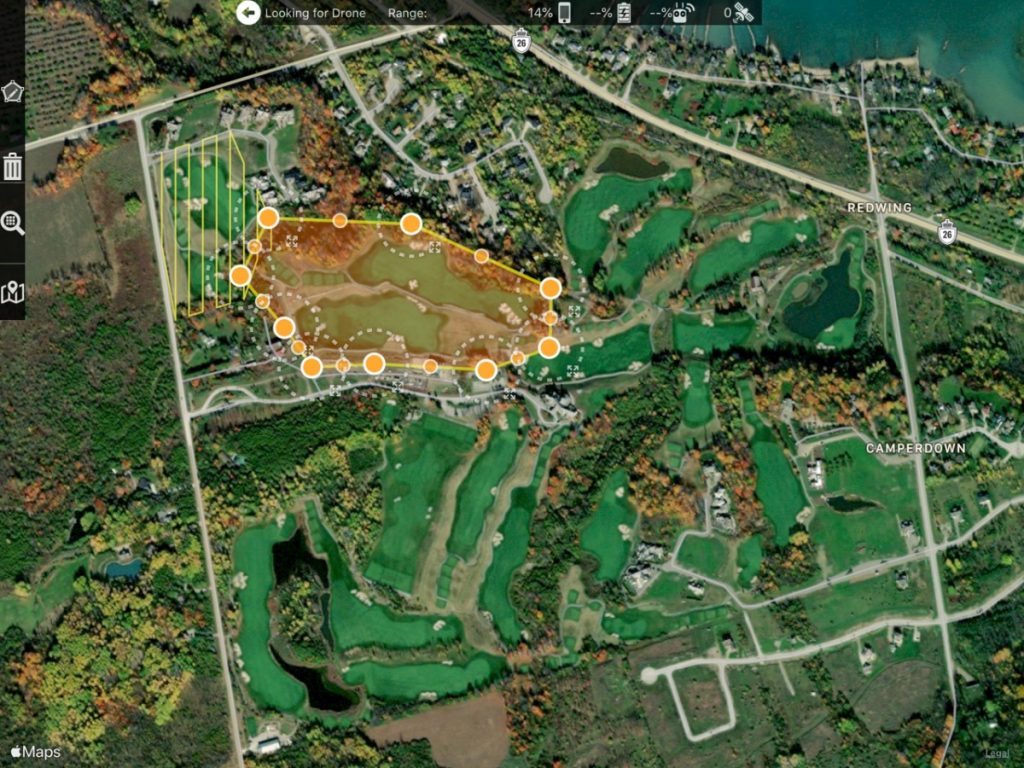
… and a flight plan is created.
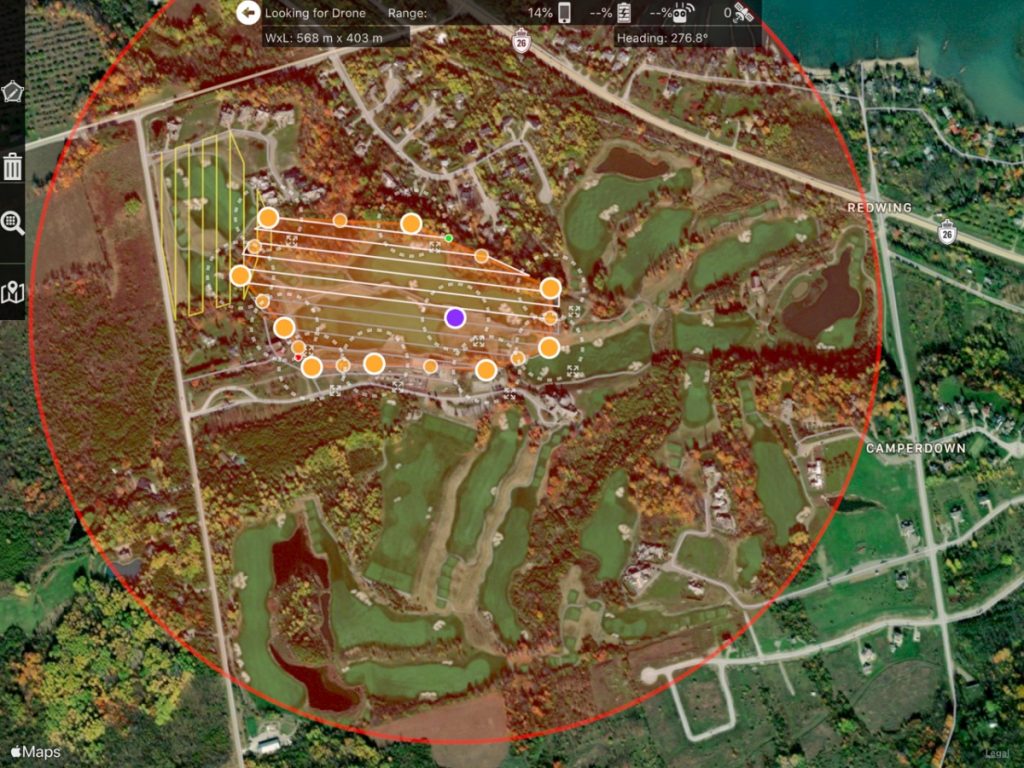
One other thing – note the red circle! That defines the maximum limit that we have set for the drone to fly. This means that the drone will not fly outside of this boundary. We keep out no flight boundary at 700 meters as this helps to ensure that we maintain visual line of site of the drone at all times.
We continue the same process until we have created flight paths that cover the entire area that we plan to fly over and then we are ready to go and fly!
One important thing – for each flight plan, the software will tell us in advance the planned time for the flight, the number of batteries that will be used, and other important information that we will use while monitoring the flight activity.
Once all these plans have been made we meet the client onsite, set the drone up and fly.
This is the process that we follow to create flight plans for any mapping project we do. It doesn’t matter if its for aggregate and mining operators, for agriculture or a construction site. The same processes apply to these types of projects and more.
Did you find this post useful? We want to educate you – so make sure you send your questions to info@locationintelligence.ca !

Comments are closed.